In the past, bird photography was reserved for those with very deep pockets. With long prime lenses costing more than $8000, their high prices excluded those of us with more modest budgets from the party. However, with the advent of relatively inexpensive super-zoom lenses from Sigma and Tamron, and even some from the mirrorless camera makers, it is much easier to get into bird photography these days. In this article, I want to give you some tips for creating compelling bird photographs. I will talk briefly about gear but will focus more on the techniques for capturing great images of birds.
1) Gear 1.1) Buy, Rent or Borrow a Long LensLet's start by discussing equipment. Bird photography is a rather specialized type of photography. And as such, some pieces of equipment will make capturing images much easier. A long lens is one of those pieces of kit.
A long lens will give you a better chance at filling the frame with the bird. It will also allow you to remain at a safe distance from it. Maintaining some distance will allow the bird to continue its behavior without feeling threatened, resulting in much more natural shots. But a long focal length lens is not needed all the time. For large birds such as pelicans and egrets, and for birds used to having people around, you can get away with shorter focal lengths. You don't only want head shots of birds. For environmental shots, a shorter lens will do the job.
Here are two images I caught on Espanola Island in the Galapagos. In the first shot of the waved albatross in flight, I used a 400mm focal length lens. The long lens allowed me to fill the frame with the bird. In the second image, I wanted to put the bird in context with his surroundings. So for this environmental shot, I used a much shorter focal length of 80mm. The shorter lens allowed me to frame not only the albatross but also his habitat.
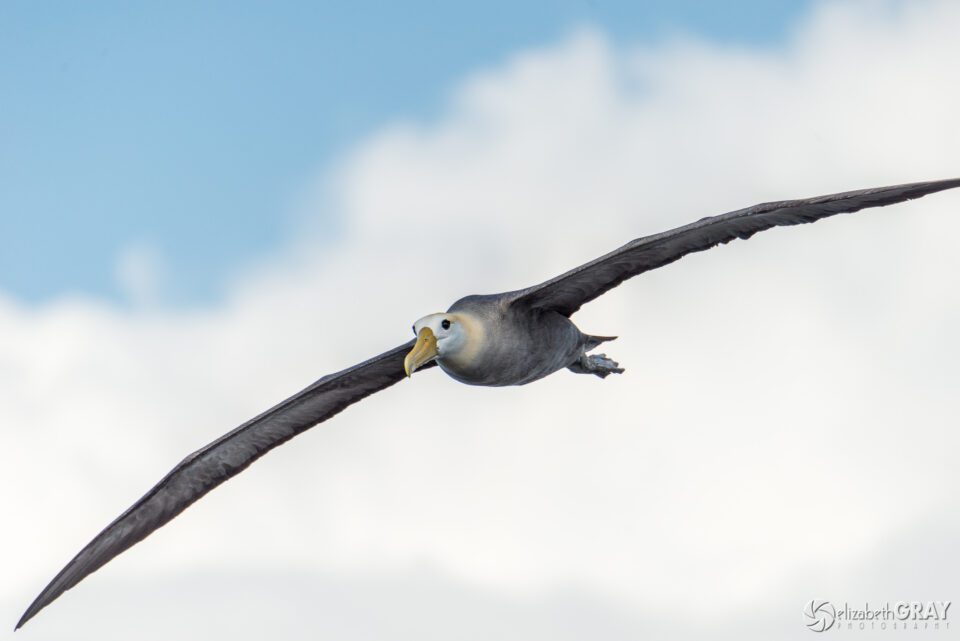
Waved AlbatrossNIKON D800 + 80-400mm f/4.5-5.6 @ 400mm, ISO 200, 1/3200, f/5.6
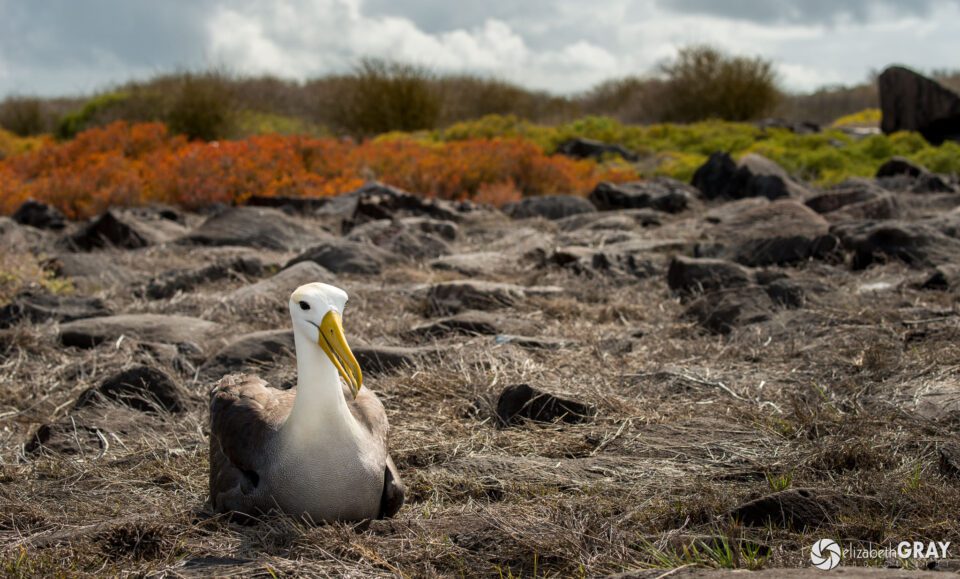
Waved AlbatrossNIKON D800 + 80-400mm f/4.5-5.6 @ 80mm, ISO 100, 1/640, f/7.1
If you are considering purchasing a new lens for your bird photography, a lens with a focal length of at least 400mm will allow you to get some great shots. Most professional bird photographers like to use lenses with focal lengths of 400mm, 500mm, 600mm or even 800mm (you may have to remortgage your house for this one). Remember that crop factor will work in your favor if you are not using a full frame camera. If you are shooting with a Canon APS-C sized sensor camera, you can take advantage of a 1.6 crop factor. That means a 400mm lens becomes equivalent to 640mm on a full frame camera. Likewise, Nikon DX shooters realize a crop factor of 1.5. If you are shooting with a mirrorless micro four thirds format camera, the crop factor is 2, and that 400mm lens is now equivalent to 800mm!
If you are just starting out in bird photography, I would recommend one of the super-zoom lenses from Sigma or Tamron. The Sigma 150-600mm f/5-6.3 DG OS HSM Contemporary Lens and the Tamron SP 150-600mm f/5-6.3 Di VC USD G2 are reliable, affordable choices for beginners. For a comparison of these lenses, take a look at John Sherman's article "Nikon 200-500mm vs. Tamron 150-600mm vs. Sigma 150-600mm C"
Nasim's article "How to Photograph Birds" goes into quite a bit of detail on lens choice. Check it out for more information too.
1.2) Invest in a Good Tripod and HeadLong lenses can get heavy pretty fast. For example, Sigma's 150-600mm lens weighs 4.3 pounds. Although it is not as heavy as Canon's 500mm f/4, which weighs just over seven pounds, it is a handful to manage for extended periods of time. A tripod will make capturing sharp images much easier, especially in low light situations requiring longer shutter speeds. You will also find that it is simpler to track birds in flight from a tripod, as your panning motion will be smoother.
When you choose a tripod, make sure you select one that is strong enough to carry the camera and lens combination you will be using. It is not necessary to invest over $1000 in a Gitzo or Really Right Stuff tripod. But, a tripod is not a piece of gear that you want to skimp on either. Buy the best quality tripod you can afford. I don't know how many photographers I have met (myself included) that have spent money on a cheap tripod, only to find that it didn't fulfill their needs in the long run. They then have to invest again, in the system that they should have purchased in the first place!
data-ad-format="horizontal">Affordable alternatives include brands such as Induro, MeFoto, Sirui and Manfrotto. With a bit of research, you should be able to find a tripod that meets both your needs and your budget.
If you are using a heavy, prime, professional, fixed aperture lens, I would recommend that you use a gimbal head to support your camera. However, if you are using one of the lighter, variable aperture lenses, a regular ball head will work fine. Again, check out Nasim's article for more details on tripod heads.
1.3) Know Your CameraWhile we are discussing gear, I can't stress enough how important it is to know your camera intimately. You need to master things like how to adjust your aperture, exposure compensation, and ISO while looking through the viewfinder. Knowing how to change your metering modes and focus modes are musts as well. Bird photography happens quickly. It is very easy to miss a shot if you are busy fumbling with the settings on your camera. Practice changing your settings until they are committed to muscle memory. This practice will not only make bird photography easier, but it will improve your keeper rate for the rest of your photography too.
Exposure compensation is probably the most important thing to know how to change on the fly. While I was taking photos of these American wigeons swimming, something scared them, and they suddenly took off. Realizing that they were now against a bright sky, and not the dark water anymore, I quickly added 2/3 of a stop of light using my exposure compensation dial. I did this while tracking their movement and maintaining focus.
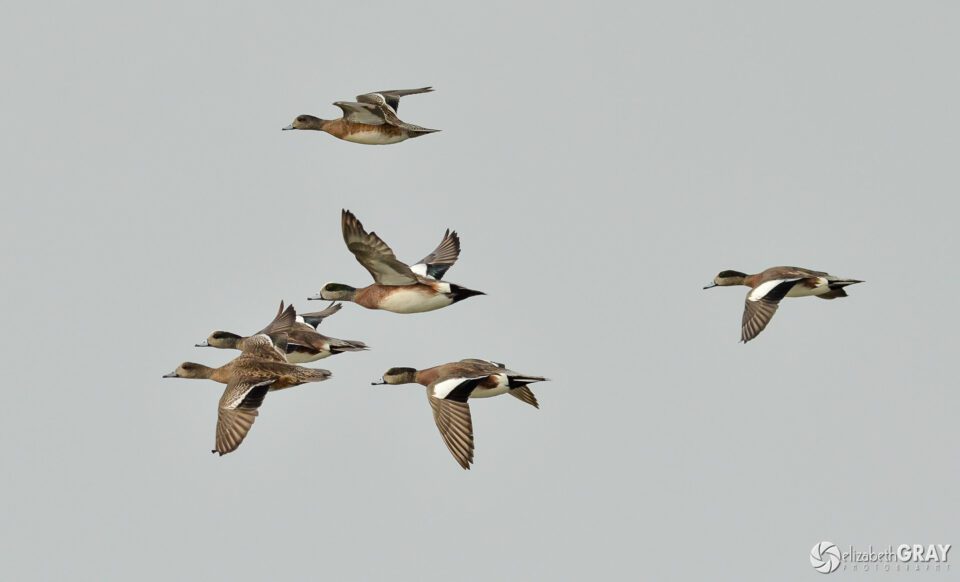
American WigeonsNIKON D7000 + 300mm f/2.8 @ 300mm, ISO 500, 1/2500, f/7.1
Bird photography is not just about the gear. Having a long lens, and a fast-focusing camera will make capturing pictures of birds easier. However, exposure settings, composition, lighting, and storytelling play an even more important role. An expensive camera and 600mm prime lens will not guarantee great shots!
2) Camera Settings 2.1) Use a Fast Shutter SpeedBirds move very quickly! Make sure that you are using a fast enough shutter speed to freeze the action. Appropriate shutter speeds vary depending on the type of bird you are photographing and what they are doing. For small birds that flit quickly from branch to branch, keep your shutter speed above 1/2000s. For larger birds that glide and have slower wing beats, you can get away with 1/1000s to 1/1500s. When I'm trying to capture a raptor in flight, I try and stay above 1/2000s. Of course, you can get away with slower shutter speeds if your subject is perching.
Using the auto ISO setting on your camera helps assure you do not dip below a set shutter speed. If the light fades, the camera will automatically bump up the ISO to maintain your minimum shutter speed. If it brightens up again, the camera will lower the ISO back down.
If you are using an older camera that does not have auto ISO, keep your eye on your shutter speeds. If they become too slow, boost your ISO until you are satisfied that the resulting shutter speed will be fast enough to freeze the action.
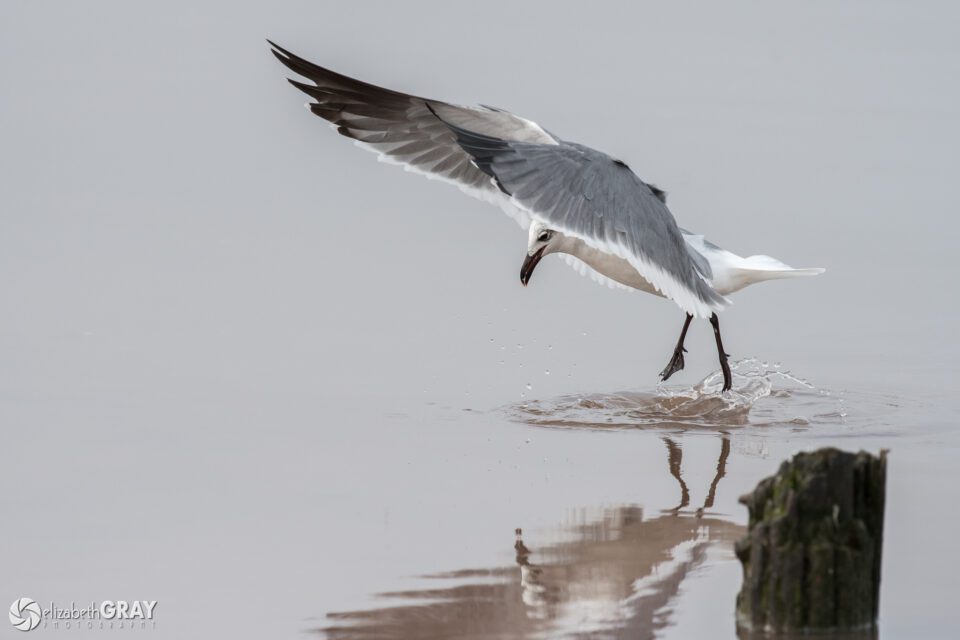
Juvenile Laughing GullNIKON D500 + 200-500mm f/5.6 @ 380mm, ISO 1000, 1/3200, f/6.3
2.2) Use a Fast Frame Release RateYou will also want to make sure that your frame release rate is set as high as possible. When the action is happening quickly, shooting a short burst of images improves your chances of getting a great shot. When I saw this brown pelican coming in for a landing, I shot a burst of five images. The middle frame was the one I liked the most.
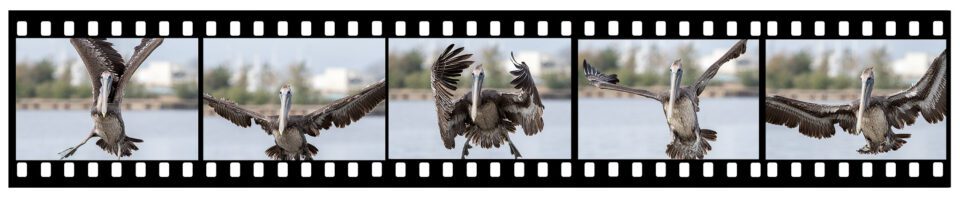
All images shot with NIKON D500 + 200-500mm f/5.6 @ 390mm, ISO 1000, 1/1600, f/9.0
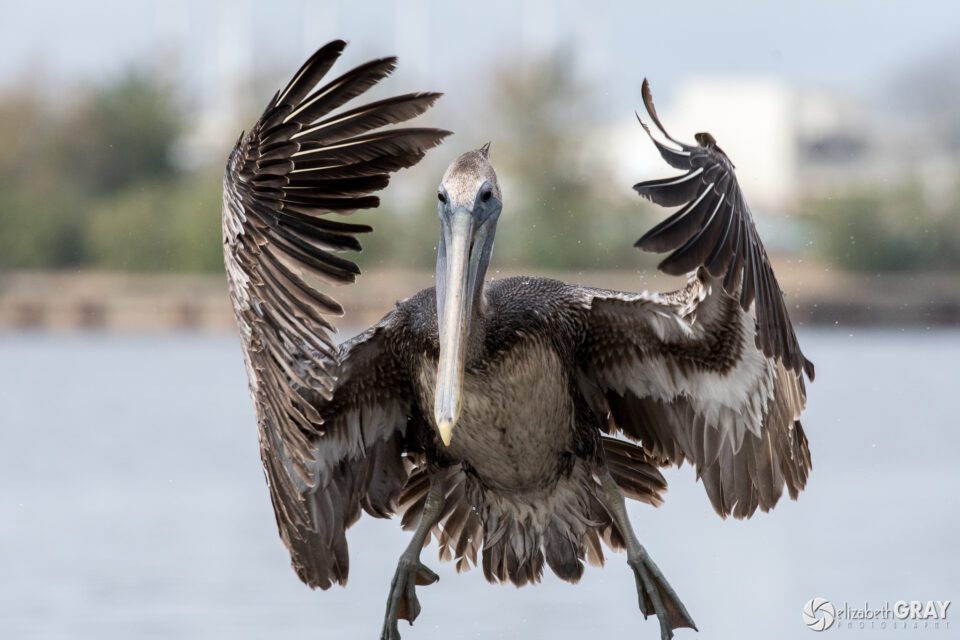
Juvenile Brown PelicanNIKON D500 + 200-500mm f/5.6 @ 390mm, ISO 1000, 1/1600, f/9.0
2.3) Get Out of Program Mode!Most of the time, aperture priority works best for photographing birds, especially in concert with auto ISO. I often get asked, "What is the best aperture setting for bird photography?" The answer is, "It depends!"
data-ad-format="horizontal">To help isolate the bird from its background, use a wide aperture to create a shallow depth of field. Many lenses are not as sharp shot wide open as they are at narrower apertures. For this reason, if the light allows, I set my aperture a third or two-thirds of a stop above the lens's widest aperture. For example, if I'm using a lens with a maximum aperture of f/4, I will set my aperture to f/4.5 or f/5. This setting results in a sharp image with a shallow depth of field and a fast shutter speed.
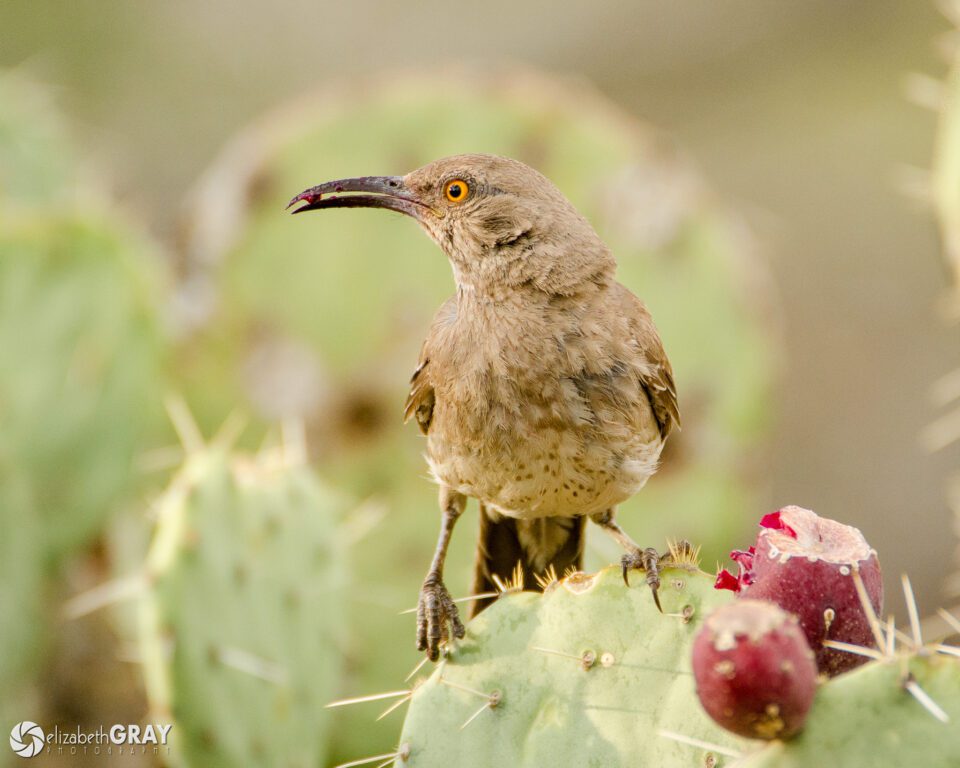
Curve-billed ThrasherNIKON D7000 + 200-400mm f/4 @ 550mm, ISO 800, 1/320, f/5.6
On the other hand, a long lens has a narrow depth of field. This can be problematic when you are photographing several birds or larger birds, especially when the wind is blowing feathers around. A shallow DOF can result in important areas of your image being out of focus. If the light is bright, stopping down your aperture a few stops will help ensure all the feathers are sharp. I will often shoot at f/8 or f/11 when I want to make sure that I get everything in focus. Shooting like this allows you a bit of a buffer if you don't quite nail the focus too. Of course, there is always a trade-off, a narrower aperture results in slower shutter speeds.
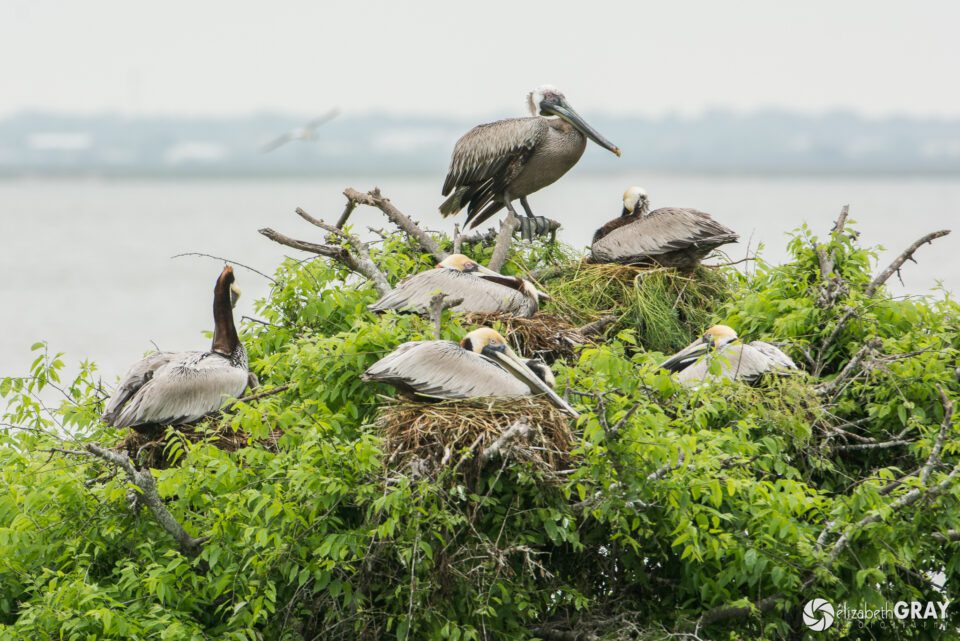
Brown PelicansNIKON D7100 + 200-400mm f/4 @ 450mm, ISO 400, 1/200, f/8.0
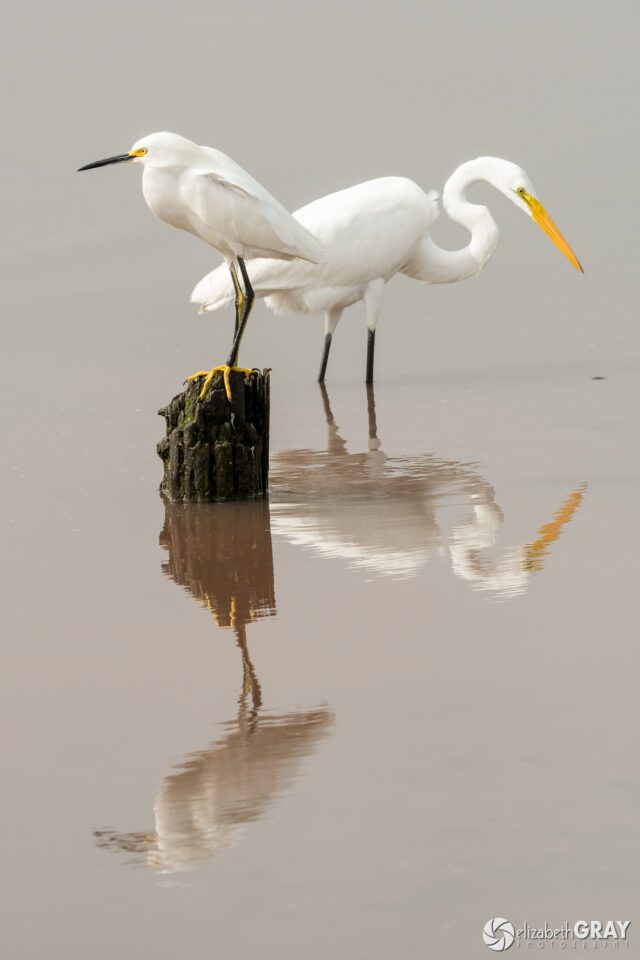
Snowy Egret (on stump) and Great EgretNIKON D500 + 200-500mm f/5.6 @ 240mm, ISO 1000, 1/2000, f/9.0
There are times when I find manual exposure mode works better than aperture priority. In a situation where the light is not changing on your subject, but the birds are flying against backgrounds of different brightnesses, you will want to set your exposure manually. Doing so will alleviate the need to change the exposure compensation. When I was shooting the sandhill cranes, I spot metered on one of the cranes on the water. I took a shot and reviewed it to make sure the bird was exposed correctly. Then I set my exposure manually based on the spot metering. When the birds took off, they passed through three different backgrounds, dark water, lighter grasses and finally the sky. But the light on the bird didn't change. If I tried to rely on aperture priority and matrix metering, the camera would have been fooled by the changing backgrounds. The result would have been underexposed birds as they flew in front of the brighter backgrounds.
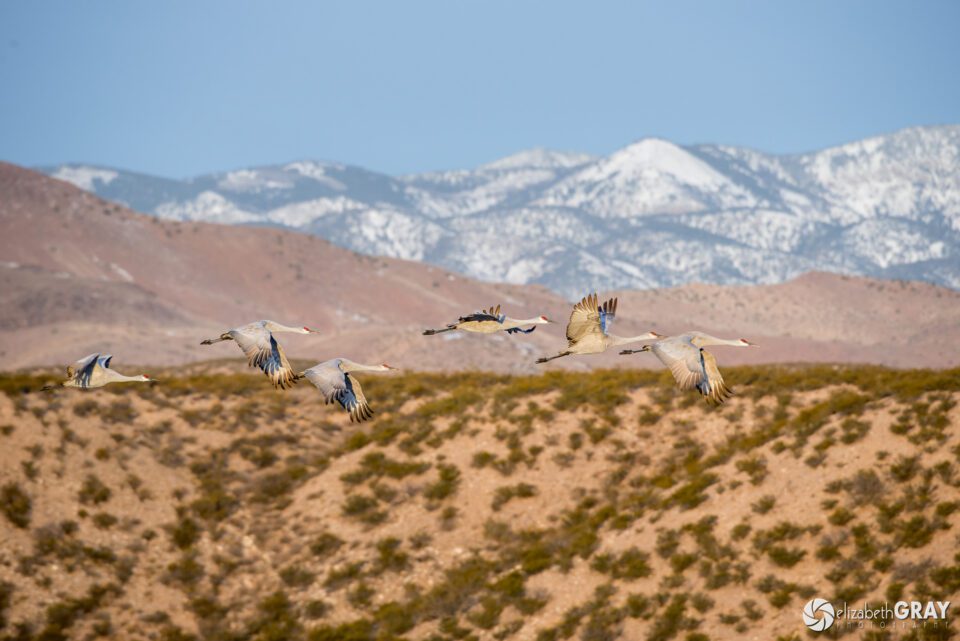
Sandhill CranesNIKON D800 + 200-400mm f/4 @ 400mm, ISO 800, 1/640, f/6.3
2.4) Understand How Auto Focus WorksFocusing on a small bird can be frustrating. Focusing on a flying bird can be even more challenging. From my experience, I have found that using a single autofocus point gives me the best chance for locking and maintaining focus. I use the center autofocus point and aim at the bird's eye or head once it has landed on a perch.
If the bird is in flight, I will often use one of the dynamic focus modes. Dynamic focus activates several AF points around the one you select. If the bird moves away from your selected AF point, one of the nearby points will snap on and grab the focus, at least in theory! It works well if you have birds flying against a blue sky. However, the tracking often gets fooled by branches, shadows, and other birds. Make sure you read your manual! Most cameras allow you to set the sensitivity of the dynamic focus mode so your camera does not get fooled by the background as easily. For a detailed discussion on focus modes, see Nasim's article "DSLR Autofocus Modes Explained."
One trick I use quite a bit, especially for birds in flight, is pre-focusing. Focus on a target that is approximately the same distance away as the bird you want to photograph. Now aim your camera at the bird. You should find it much easier to find the bird in the viewfinder now.
To up your chances of maintaining sharp focus, set your camera to continuous auto focus. This way your camera will continue to focus for as long as you are depressing the shutter button halfway.
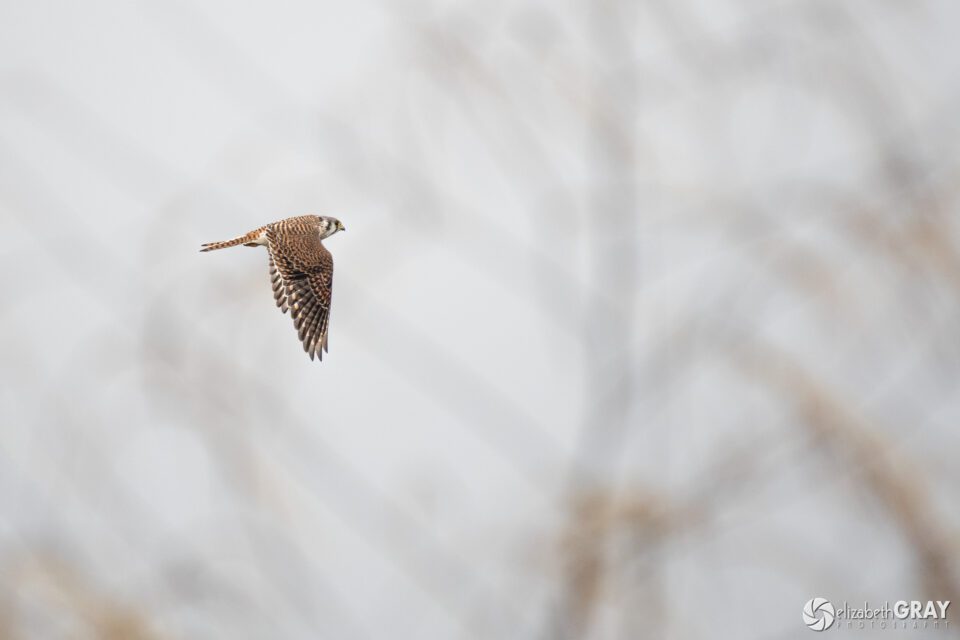
American KestrelNIKON D500 + 200-500mm f/5.6 @ 500mm, ISO 800, 1/3200, f/5.6
3) Tips for Creating Wonderful Images of Birds 3.1) Approach Slowly and Take a "Safe Shot"Birds are very skittish. They can sense when you are approaching from quite a ways off and will fly away if they feel threatened. To avoid frightening them, advance very slowly. Stop to let the bird know you are not a threat every few feet. I tell my students to take a "safe shot." That is, even if you are not as close as you would like to be, take a shot. Wait a bit, then start walking slowly forward again. Pause, and take another image. Keep repeating the process of slowly walking closer by a few steps, pausing and taking a shot. This will ensure that you capture at least a record shot. Once you have reached a distance that is close enough for a good shot but a distance that does not threaten the bird, you can start to compose and create more thoughtful images.
In this series of photos, I spotted a great egret over 100 yards away. I knew I had time at my current location to take an environmental portrait of the bird in his natural surroundings without frightening him away. After I had captured my first "safe shot" I continued to approach the bird, pausing every few feet to take another shot. This slow approach allowed the egret to adjust to my presence. I was able to get within approximately 25 feet of him. At this point, I was able to compose several different photographs of him. When I looked back at the exif data from the images, I found that the time between the first and last shot was almost 15 minutes.
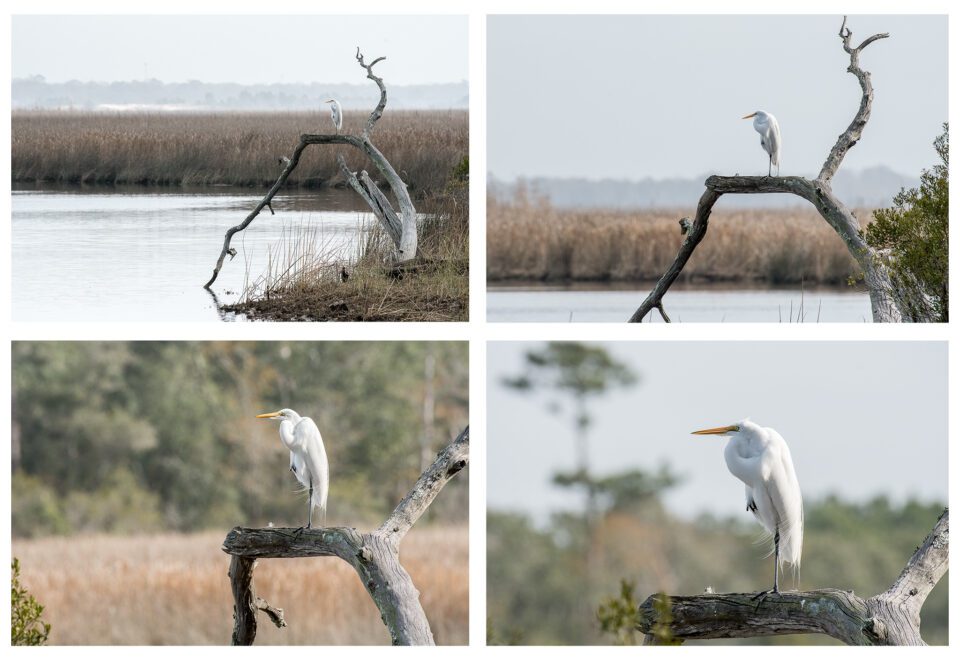
Great EgretNIKON D500 + 200-500mm f/5.6 @ 500mm, ISO 1000, 1/2500, f/8.0
3.2) Research You Subjects and Anticipate BehaviorDid you know that most raptors will poop just before they take off? Before you head off on your shoot, study the behaviors of the species of birds you will be photographing. Learn their nesting, feeding and mating habits. A little homework on your behalf will pay huge dividends once you are in the field.
data-ad-format="horizontal">For example, flycatchers usually return to the same perch each time they dart off after a bug. Kingfishers will hover before they dive for a fish. Birds tend to take off and land into the wind. Knowing these things will help you prepare for the action in advance so that you won't miss that captivating shot.
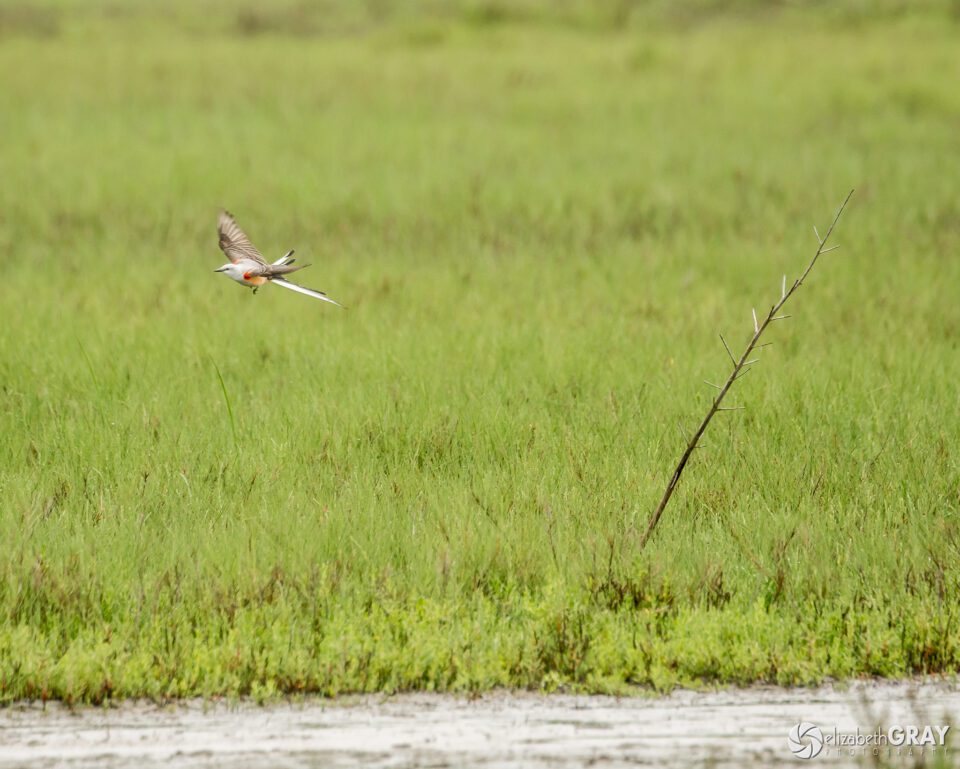
Scissor-tailed FlycatcherNIKON D7100 + 80-400mm f/4.5-5.6 @ 400mm, ISO 400, 1/800, f/6.3
On a trip to Galveston, Texas several years back, I was hoping to photograph some white-tailed kites. There was a pair in the area that had started to build a nest. As a courtship ritual, the males will often catch a mouse and offer it to the female in flight. Kind of a "will you marry me?" gesture. When I saw the male with a catch, and then saw the female take off, I was prepared to capture their magnificent high flying exchange. It all happened very fast. Was I lucky? Absolutely! But had I not had an idea of what was about to happen, I probably would have missed the shot.
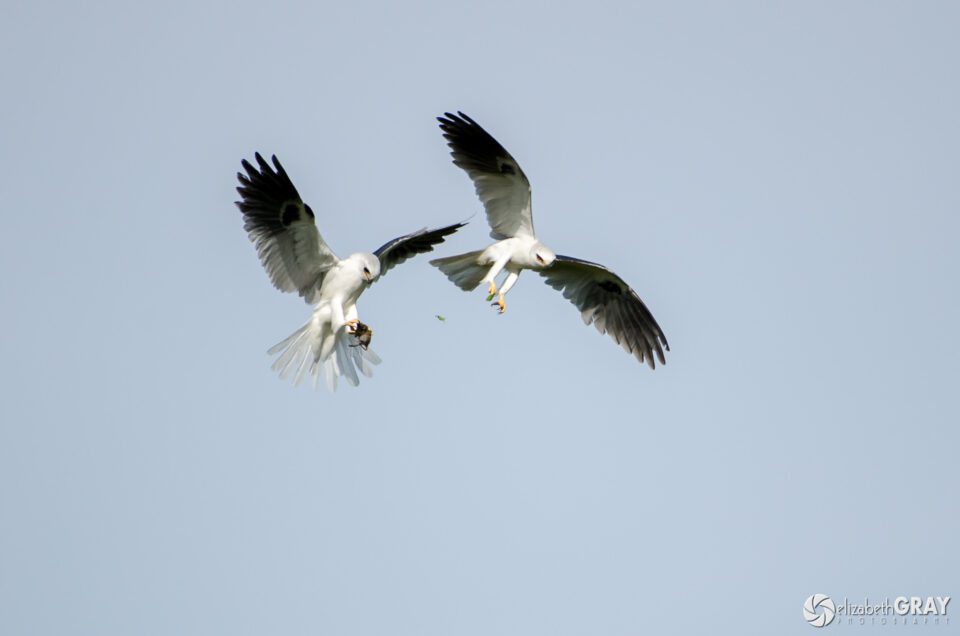
White-tailed KitesNIKON D7000 + 200-400mm f/4 @ 550mm, ISO 400, 1/3000, f/5.6
Just a quick aside here. For every sharp shot of a bird taking off towards me, I have hundreds of butt shots of them flying away! Don't get discouraged. Eventually, luck will be on your side and the bird will cooperate! But by learning more about their behavior, your odds of being in the right position increase.
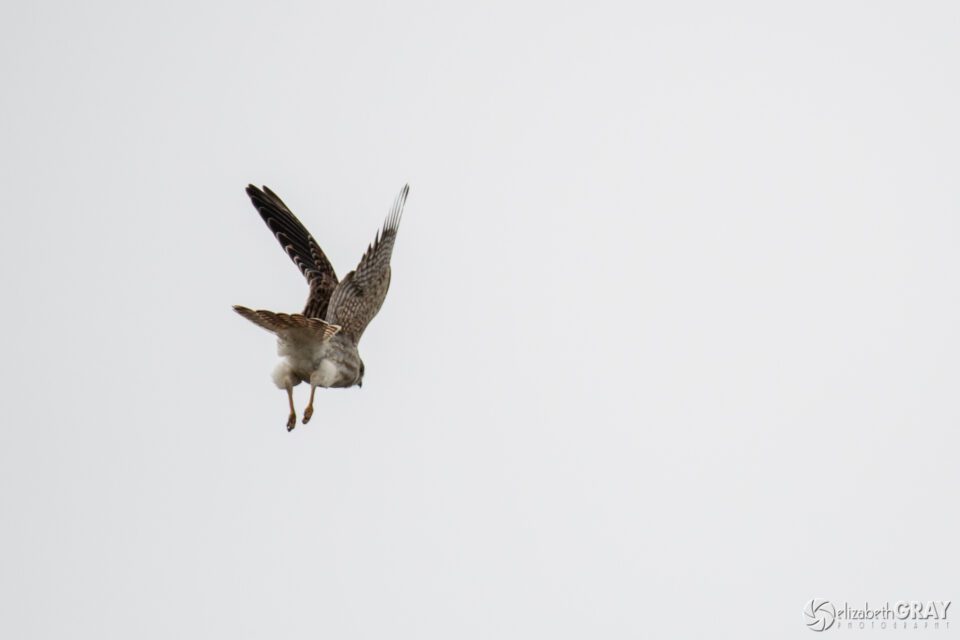
American KestrelNIKON D500 + 200-500mm f/5.6 @ 500mm, ISO 800, 1/4000, f/5.6
3.3) Isolate the Bird from the BackgroundIt is not always easy to compose a shot with a wild bird. Birds do not respond well to requests to stand still or fly to a better branch! More often than not they are perching in thick branches or dense grasses. Songbirds are particularly hard to shoot, as they continually dart amongst the trees. Whenever possible, try to capture shots with clean backgrounds. A busy background will compete with your subject. By selecting a wide aperture, your depth of field will be shallow, and it will be easier to isolate the bird.
The following two images are of the same painted bunting. Notice how the background in the first shot is quite messy. Even though it is out of focus, it is competing with the bird. In the second shot, the background compliments the bird much better.
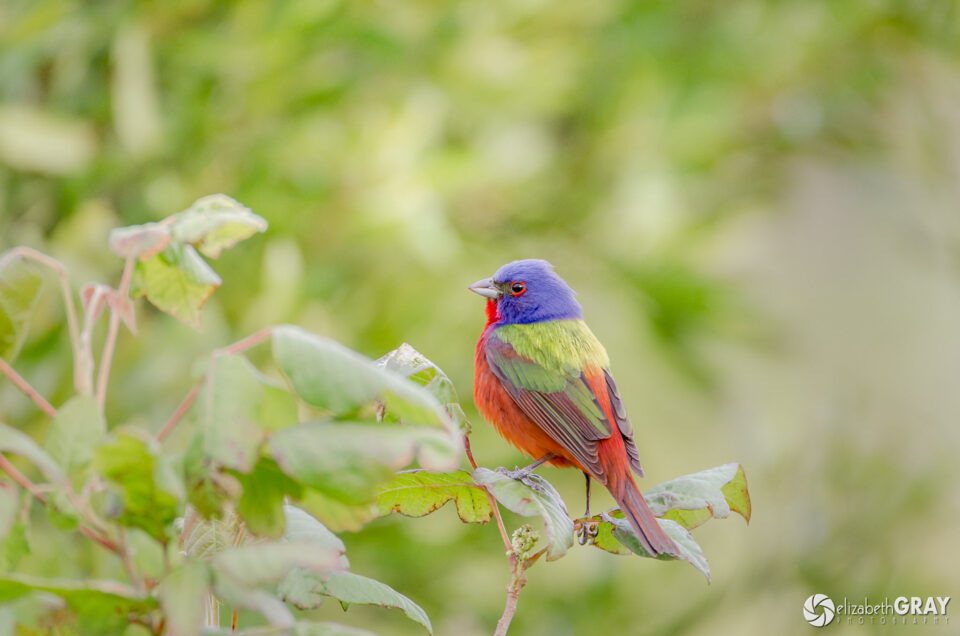
Painted BuntingNIKON D7000 + 200-400mm f/4 @ 550mm, ISO 800, 1/45, f/5.6
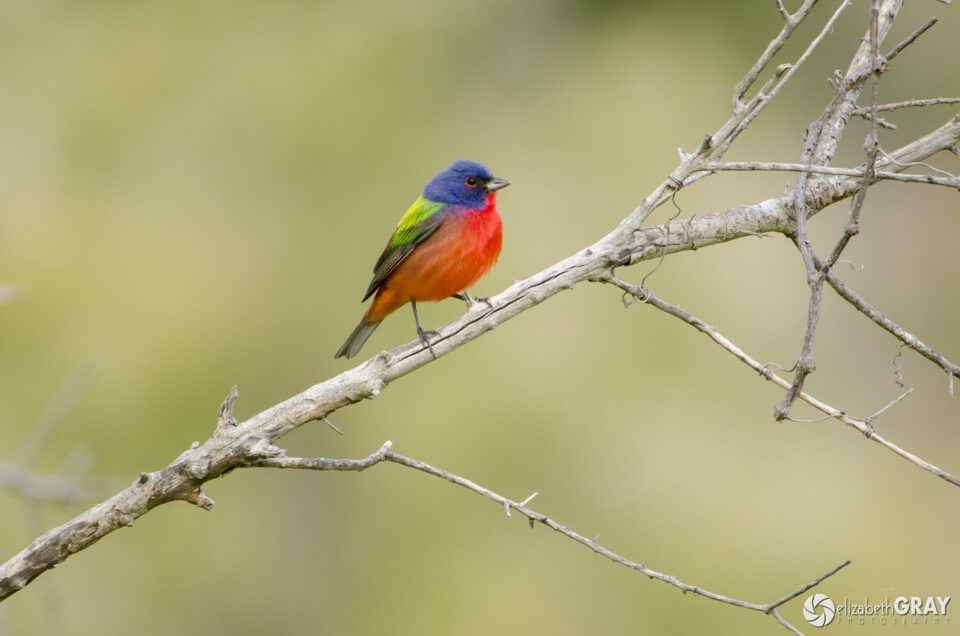
Painted BuntingNIKON D7000 + 200-400mm f/4 @ 550mm, ISO 800, 1/90, f/5.6
If the bird is not perching in an ideal location, try to find an angle that isolates him. Shoot from lower down, so the sky becomes the background. Or move to one side so that the leaves from a bush further away become your background. The farther away the background is from your subject, the more out of focus it will appear, allowing the bird to be the star of the photo.
If you still can't find an angle that works, then study the bird's behavior. Does he flit between other branches? Maybe one of them would make a better composition. Move your camera and set up your shot. Now, wait for the bird to land there. This is where patience pays off!
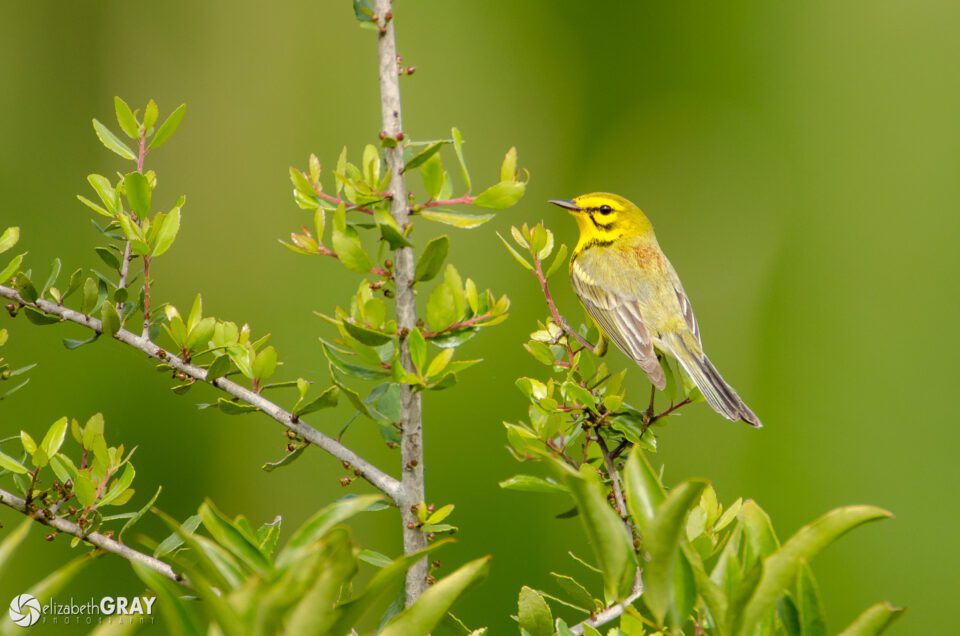
Prairie WarblerNIKON D7000 + 200-400mm f/4 @ 550mm, ISO 400, 1/750, f/5.6
3.4) Focus on the Bird's EyeJust as with portrait photography, a sharply focused eye is key to creating stunning photographs of birds. A sharply focused eye creates a connection with the animal and helps to draw the viewer into the image. Although not always possible, try to position yourself with the sun behind you. Doing so will create lovely catch lights, or highlights, in the bird's eyes.
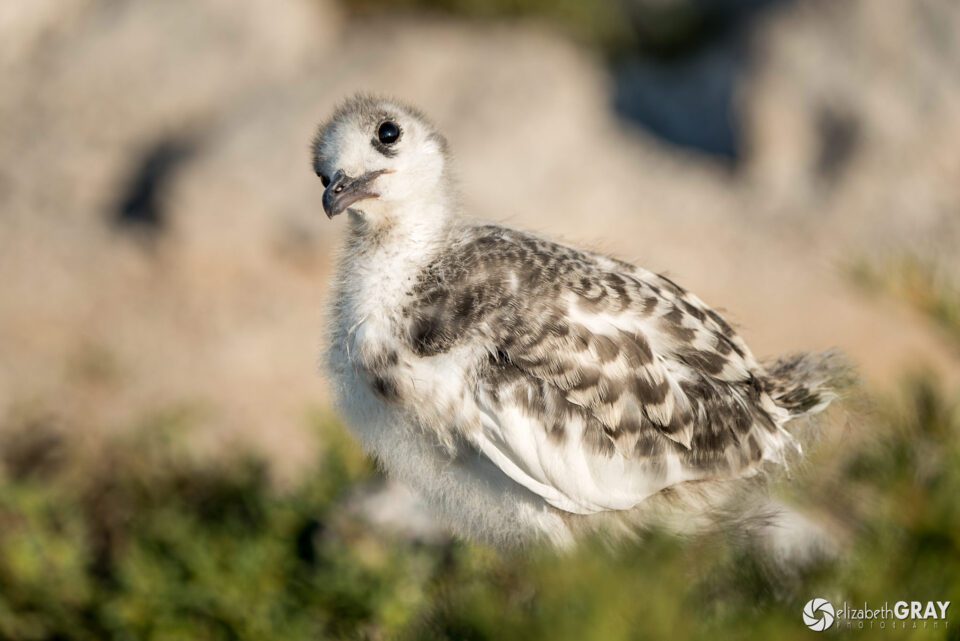
Swallow-tailed GullNIKON D800 + 80-400mm f/4.5-5.6 @ 270mm, ISO 100, 1/500, f/5.6
3.5) Be Aware of What is Happening Around YouLooking through the lens is like wearing blinders, you become unaware of what is going on around you. You should always prepare yourself for the unexpected. Keep both eyes open when you are focusing, listen for noises that might indicate something exciting is about to happen, and look up from your camera every so often to see what is going on in other directions.
Last January I was in Bosque del Apache National Wildlife Refuge in New Mexico photographing the Sandhill Cranes. As I was focusing on a group of cranes preparing to take off, I noticed out of the corner of my eye a bald eagle. I was able to switch my focus quickly from the cranes to the eagle. Had I not been aware of my surroundings, I would have missed the shot.
data-ad-format="horizontal">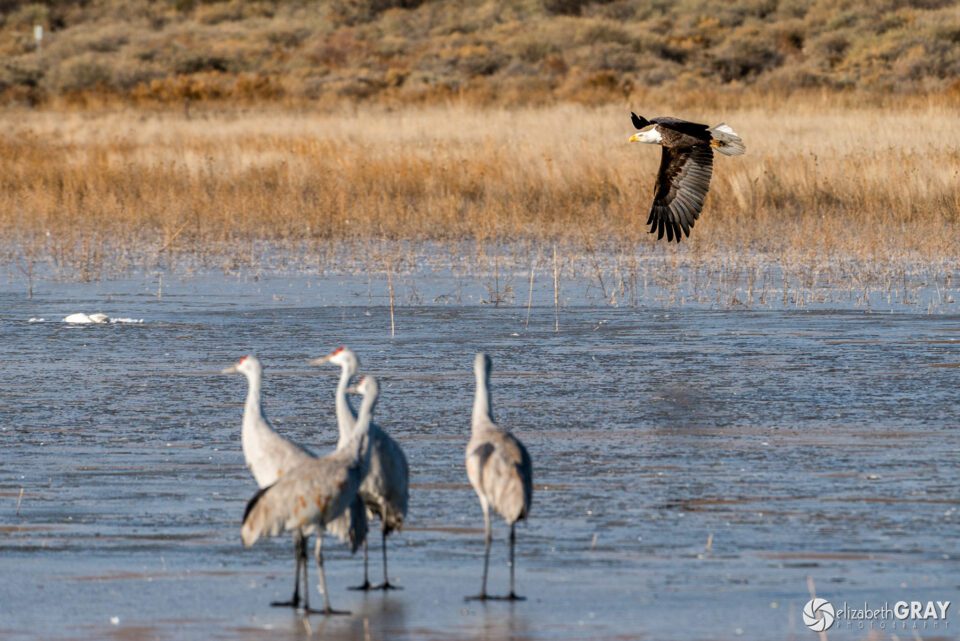
Bald Eagle with Sandhill Cranes in ForegroundNIKON D800 + 200-400mm f/4 @ 400mm, ISO 400, 1/1000, f/8.0
Here is another example. While photographing red-billed tropicbirds along the cliffs in the Galapagos, a frigate bird suddenly appeared. It attacked one of the tropicbirds that had just caught his breakfast. The frigate bird grabbed the tropicbird by the tail and carried it down to the water in an attempt to dislodge the tropicbird's meal. Again, I had to adjust to this quickly unfolding scenario to get the shots.
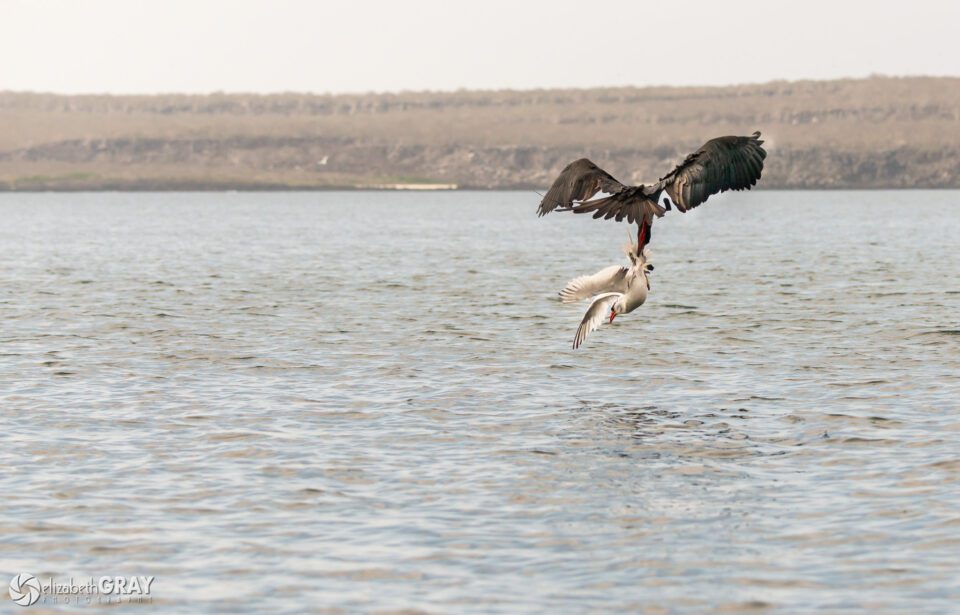
Frigate Bird attacking a Red-billed Tropic BirdNIKON D800 + 80-400mm f/4.5-5.6 @ 116mm, ISO 800, 1/5000, f/5.6
3.6) Create Interesting CompositionsWhen you are creating bird photographs, try and take your shots from the bird's perspective. Ideally, you would like your lens to be at the same level as the bird's eyes. For shorebirds that means getting down low to the ground. I wear old clothes that I don't mind getting wet and dirty. I lie on the sand with my camera as low as possible to the ground (use a ground pod or splay the legs of your tripod to get low enough). Shooting from this angle also blurs the foreground and background beautifully.
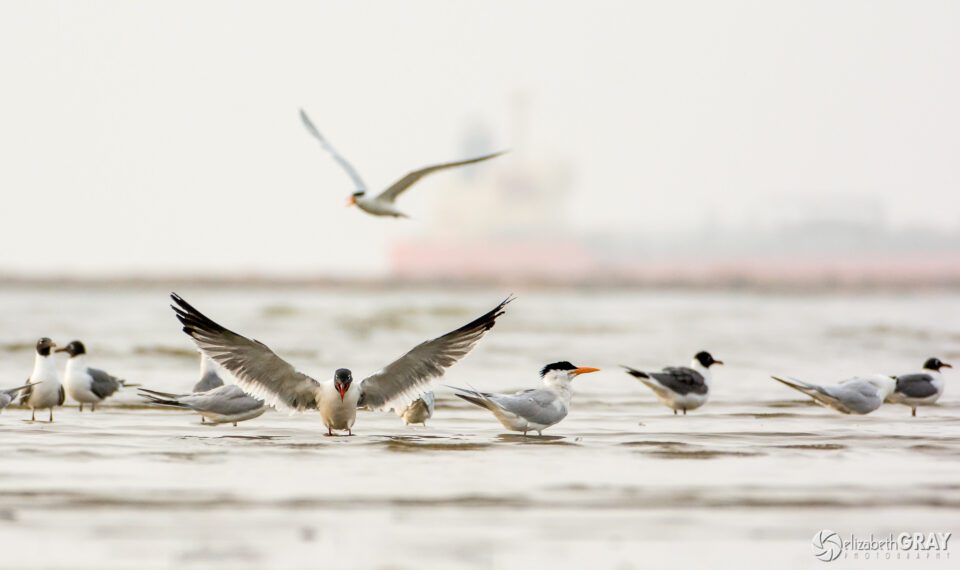
Laughing Gulls (wings spread) with Royal Terns (to right and landing)NIKON D7100 + 200-400mm f/4 @ 380mm, ISO 800, 1/2000, f/5.6
When you are choosing where to put the bird in the frame, give it room to breathe. If the bird is looking to one direction, give it space in the direction of his stare. Or if the bird is in flight, leave more sky in the direction he is moving. You don't want it to look like he is flying out of the picture!
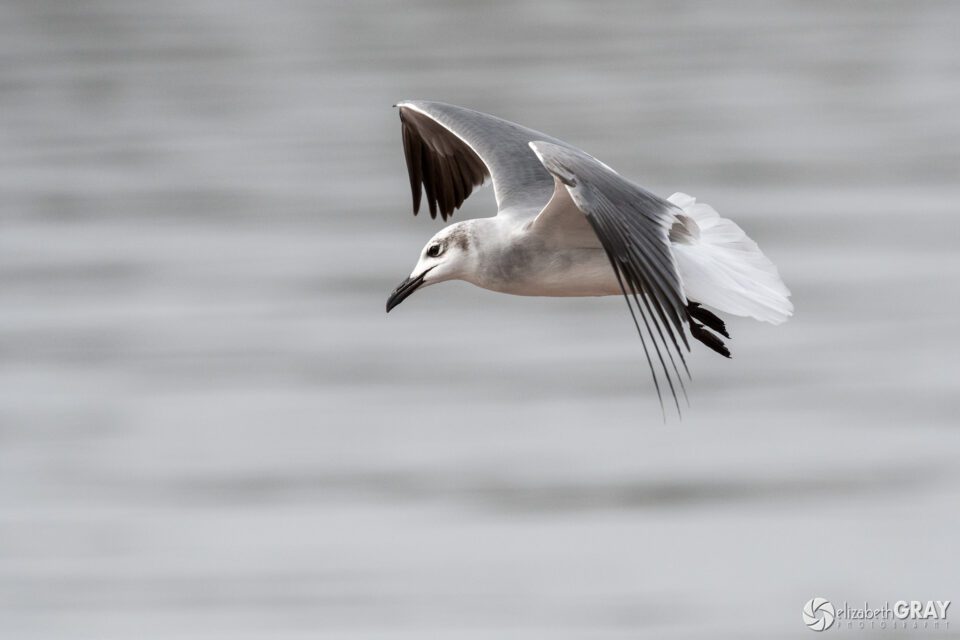
Juvenile Laughing GullNIKON D500 + 200-500mm f/5.6 @ 390mm, ISO 1000, 1/6400, f/6.3
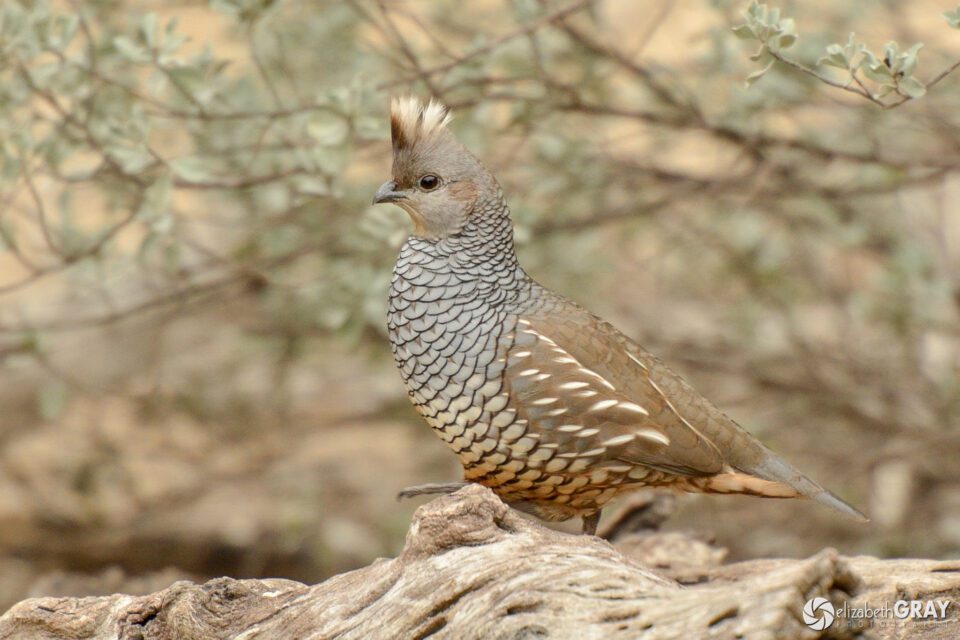
Scaled QuailNIKON D7000 + 70-200mm f/2.8 @ 340mm, ISO 800, 1/350, f/4.8
Not all your shots have to be tight portraits. Try to include habitat in some of your images to give a sense of the environment. For environmental shots, you can usually get away with a shorter focal length lens. Select an aperture that produces enough depth of field to tell your story.
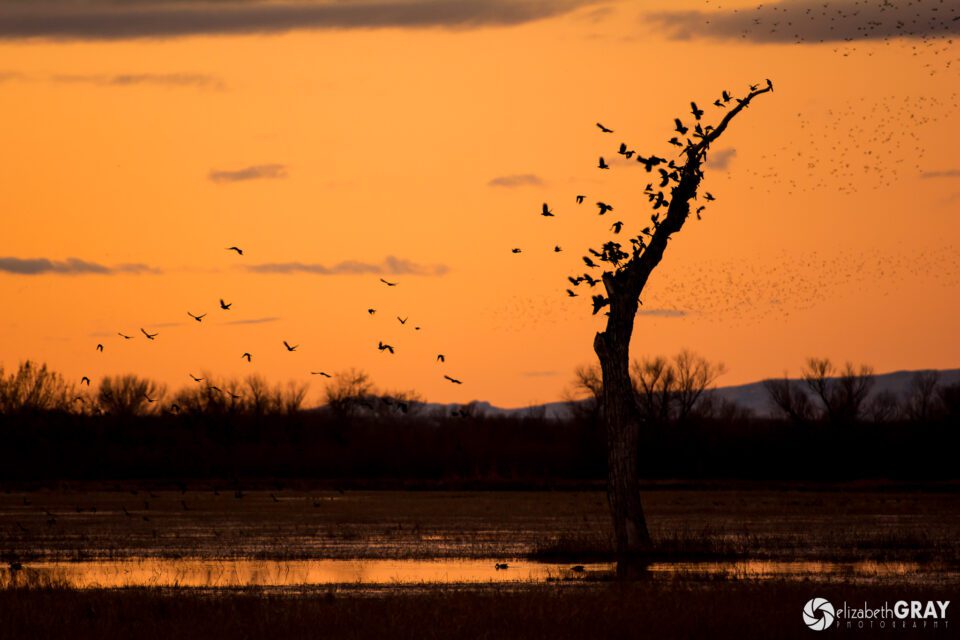
American CrowsNIKON D7100 + 70-200mm f/2.8 @ 200mm, ISO 800, 1/160, f/2.8
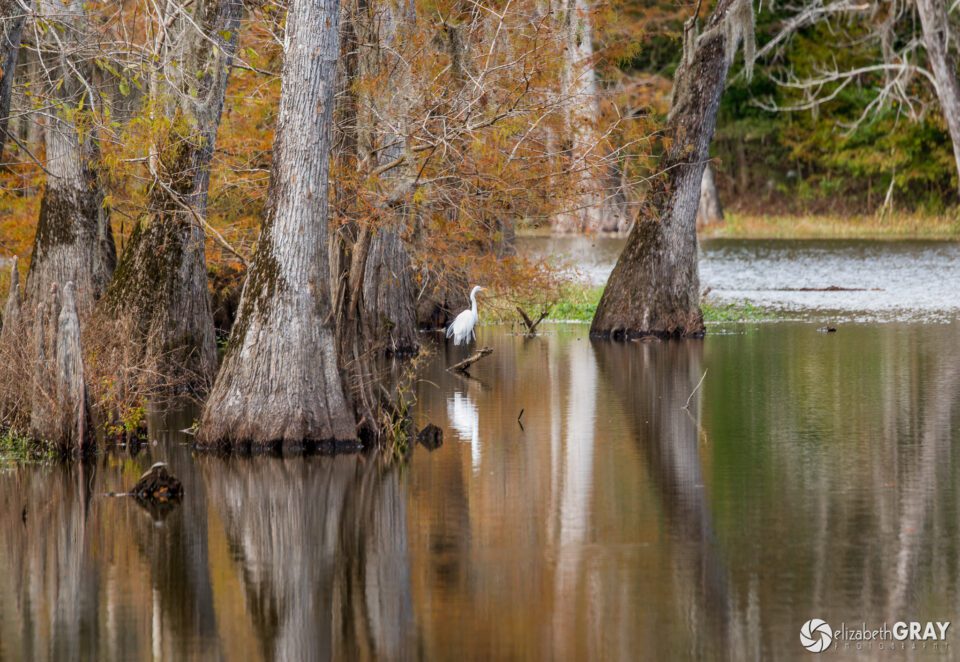
Great EgretNIKON D800 + 80-400mm f/4.5-5.6 @ 400mm, ISO 400, 1/160, f/6.3
3.7) Look for Great LightFor the best light, get out first thing in the morning and later in the day. These times are also when birds are the most active. Although I am not a morning person, I know that getting up early almost always results in some great shots. The light changes quickly at sunrise and sunset, so make sure you are checking your exposure frequently. You will need to raise your ISO to maintain fast enough shutter speeds and open up your lens to its widest aperture as the sun goes down.
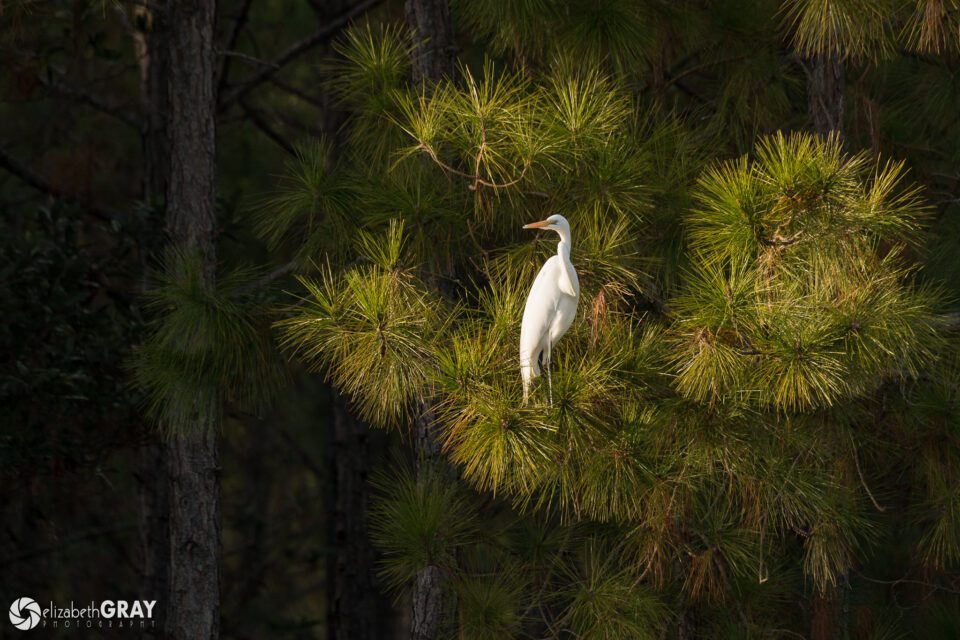
Great EgretNIKON D7100 + 80-400mm f/4.5-5.6 @ 400mm, ISO 400, 1/640, f/6.3
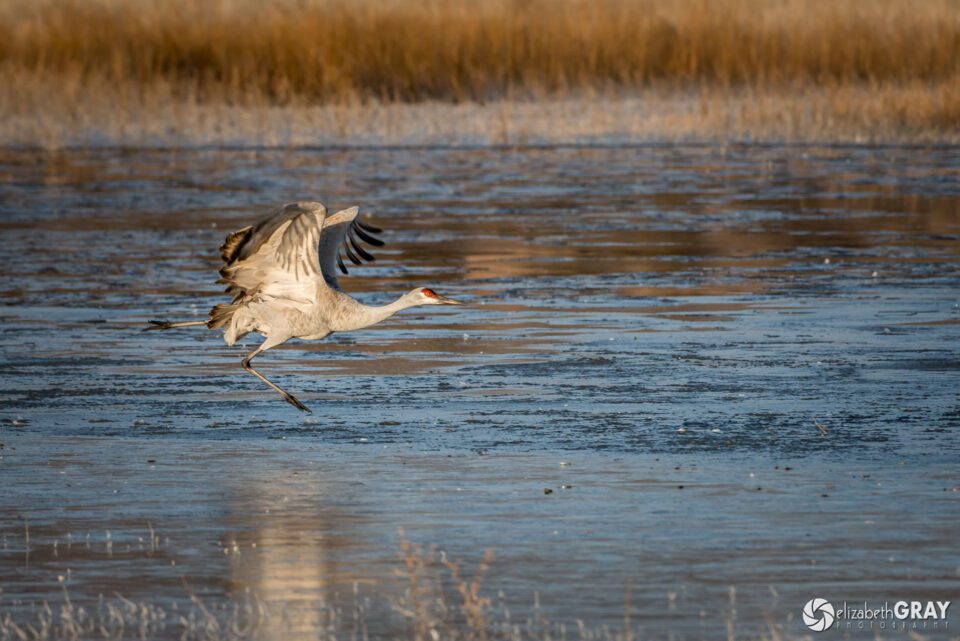
Sandhill CraneNIKON D800 + 200-400mm f/4 @ 400mm, ISO 800, 1/1600, f/7.1
3.8 Visit a Location FrequentlyThe best way to familiarize yourself with lighting conditions, bird habitats and good vantage points is to visit a site often. We have a couple of parks nearby that I visit once or twice a week. I know where the birds are going to be, and I know where I should set up to get the best shots at certain times of the day. These past few weeks I have noticed that the snowy egrets are starting to prepare for breeding season. They are becoming more territorial, and fights between the males are occurring more frequently. It took me five trips over two weeks to one of my favorite birding spots to capture this shot. I am happy with this shot. However, I would love to get one with both birds in focus. I will continue to go back in the hopes of creating a better one.
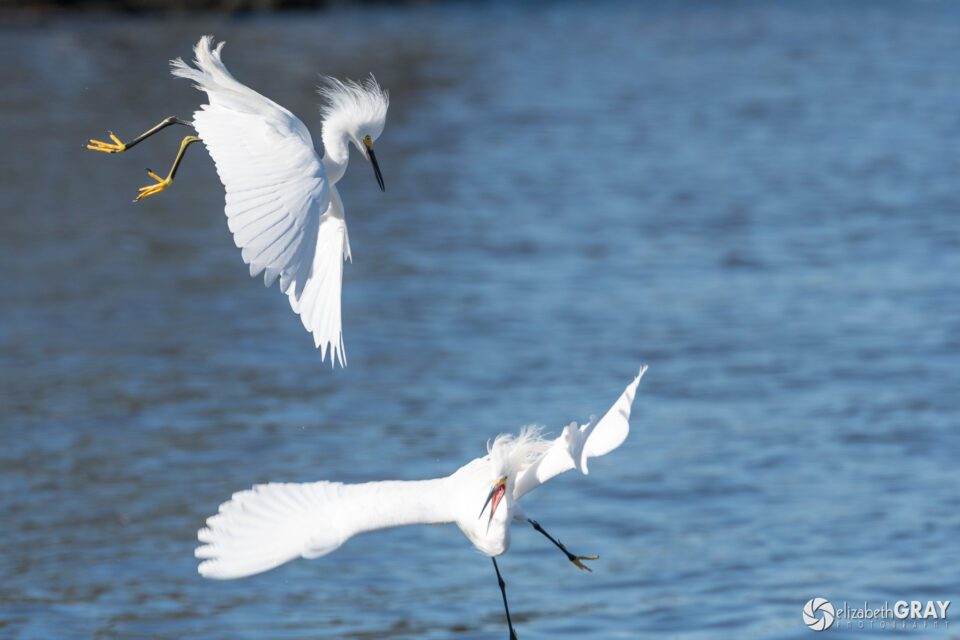
Snowy EgretsNIKON D500 + 200-400mm f/4 @ 360mm, ISO 400, 1/1250, f/7.1
3.9 Capture BehaviorAlthough I love a good bird portrait, capturing bird behavior is the most rewarding for me. But, it is also the most difficult. A good place to start is to photograph birds landing and taking off. Stand with the wind at your back and take a burst of shots with a fast shutter speed to freeze the action.
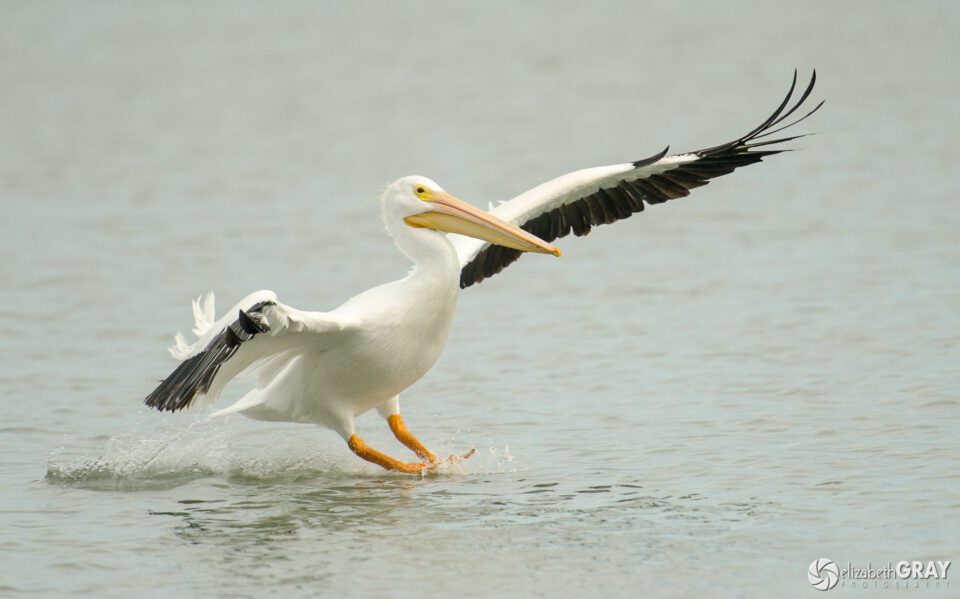
American White PelicanNIKON D7000 + 70-200mm f/2.8 @ 280mm, ISO 400, 1/6000, f/4.0
Try to capture activities such as nest building, eating, and courting.
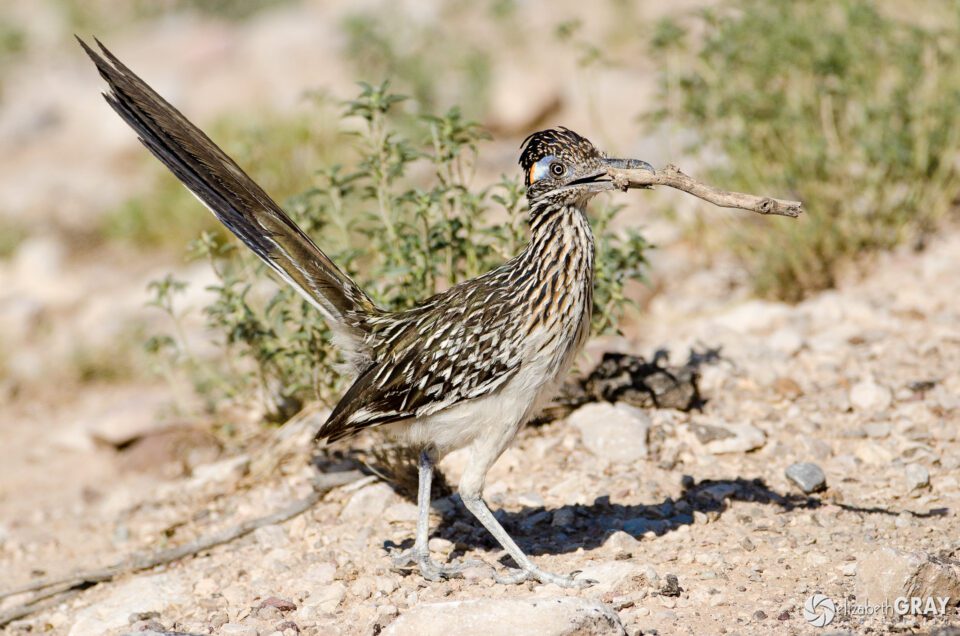
Greater RoadrunnerNIKON D7000 + 200-400mm f/4 @ 330mm, ISO 400, 1/2500, f/5.6
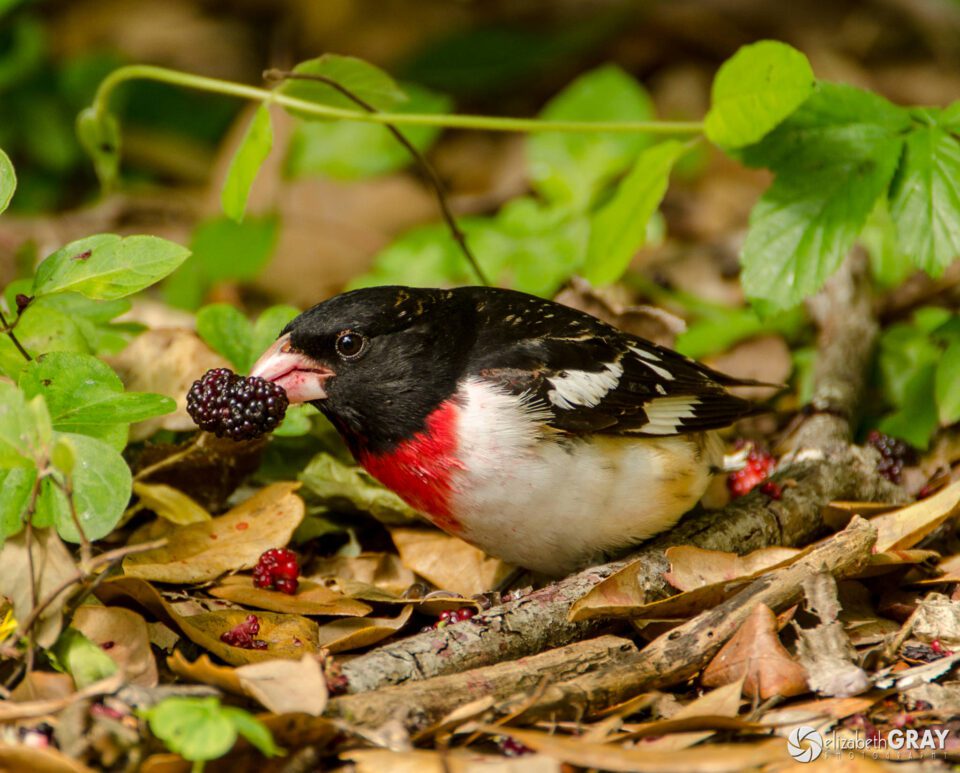
Rose-breasted GrosbeakNIKON D7000 + 200-400mm f/4 @ 550mm, ISO 200, 1/125, f/5.6
3.10) Get CreativeNot all your photographs of birds have to be lifelike. Experiment with different shutter speeds, unusual angles, silhouettes, and isolate parts of the bird.
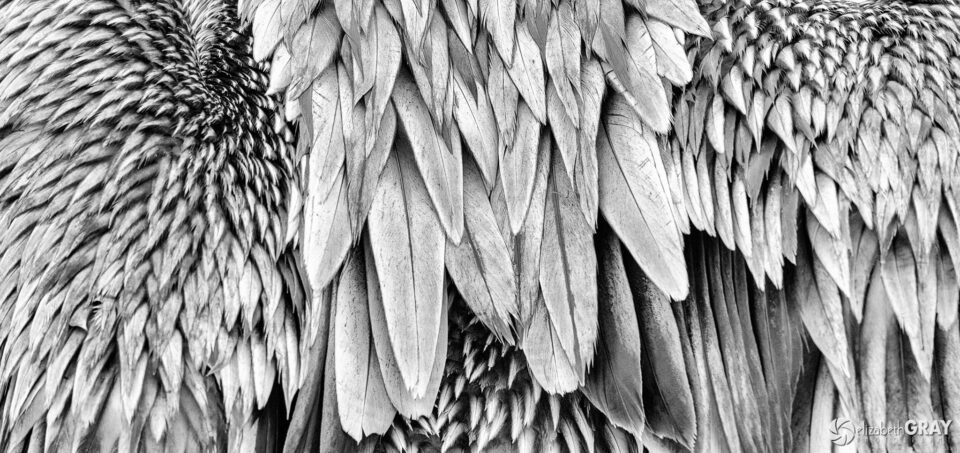
Brown PelicanNIKON D800 + 80-400mm f/4.5-5.6 @ 400mm, ISO 800, 1/160, f/10.0
Panning is a technique that uses a slow shutter speed. You follow the motion of the bird while releasing the shutter. This technique creates a sense of movement by blurring the background while maintaining focus on the bird. Panning takes lots of practice. Do not get discouraged! A good place to start is at the beach using seagulls as your subject.
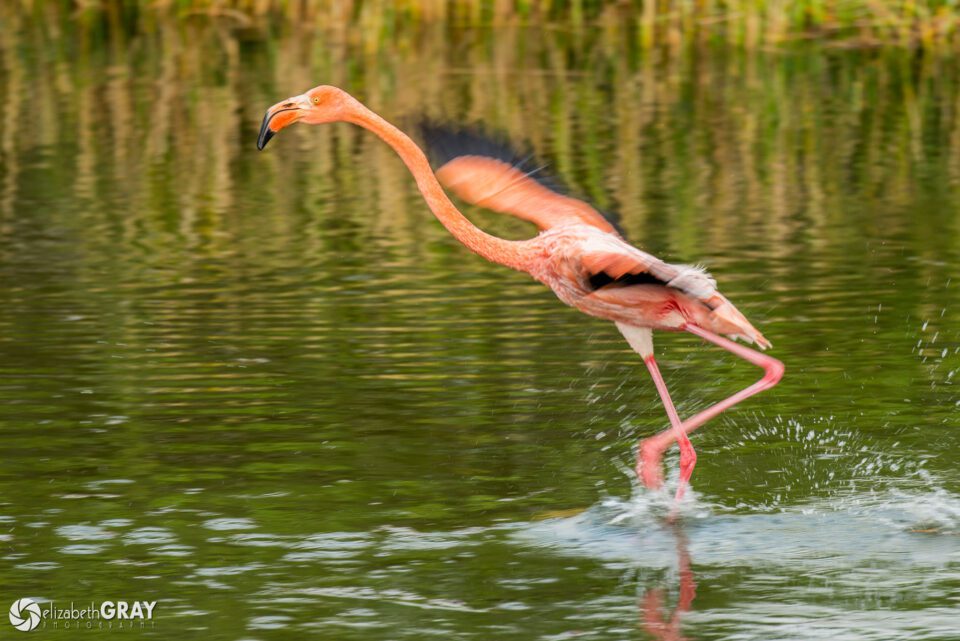
Galapagos FlamingoNIKON D800 + 80-400mm f/4.5-5.6 @ 400mm, ISO 200, 1/200, f/5.6
4) Have Fun!Remember that it is not the gear that takes great shots. It is practice, planning and proper execution that brings home keepers. The more you practice, the better you will become at locking focus on the eye and capturing birds in flight. To hone your skills, practice on large birds. Go to parks where the birds allow you to get a little closer. Pelicans, ducks, and geese are all great species to learn on. To work on the smaller birds, set up a feeder and bird bath in your yard and let the birds come to you.
Bird photography is very rewarding, highly addictive and a lot of fun. Capturing a sharp shot of a bird in action will send an adrenalin rush through your body. I'm confident that if you give these tips a try you will not only create some great photographs, but you will gain a greater appreciation for what incredible creatures birds are.
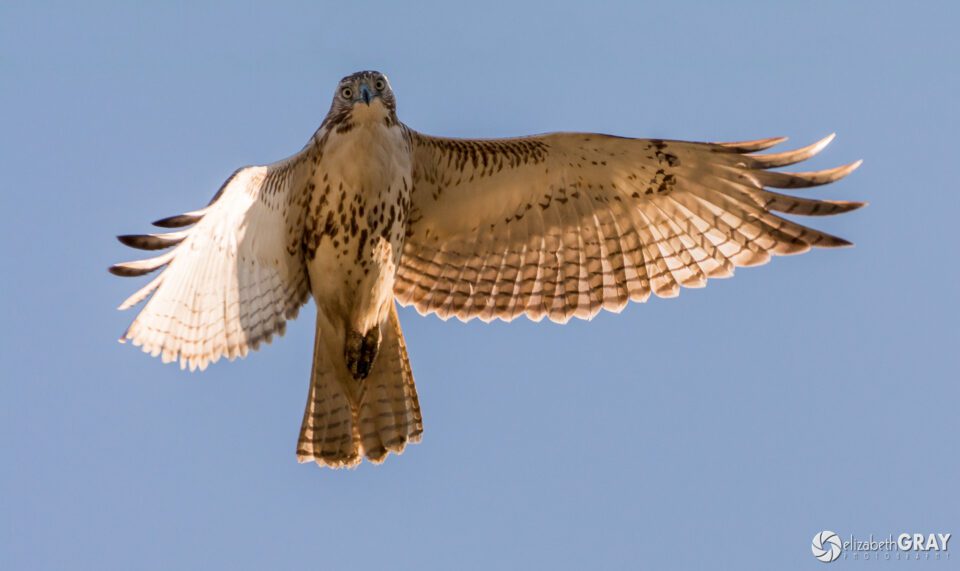
Red-tailed HawkNIKON D7100 + 200-500mm f/5.6 @ 500mm, ISO 400, 1/1600, f/6.3
Source: Bird Photography Tips and Tricks


